Adding a location to Google Maps is easier than you might think — whether it’s your home, your favorite local coffee shop, or a brand-new business. In this full step-by-step guide, I’ll walk you through how to add and label a location in Google Maps from both a personal and business perspective.
🗺️ Step 1: Drop a Pin on the Map
To begin, open Google Maps and zoom in on the area where you want to place the new location.
-
Tap (or click) on the exact spot to drop a pin.
-
For better precision, tap and hold to fine-tune the location of the pin.
-
Once the pin appears, tap it to bring up the location settings.
🏷️ Step 2: Add a Label (Temporary)
If you just want to add a personal label (not visible to others), swipe up on the pin info and choose “Label”.
-
You can name the location anything you’d like — “Home,” “Work,” or even “Doggy Daycare.”
-
Tap Done, and the label will appear for your personal reference in the future.
Note: Labels are not permanent or public. They only show up for your own account.
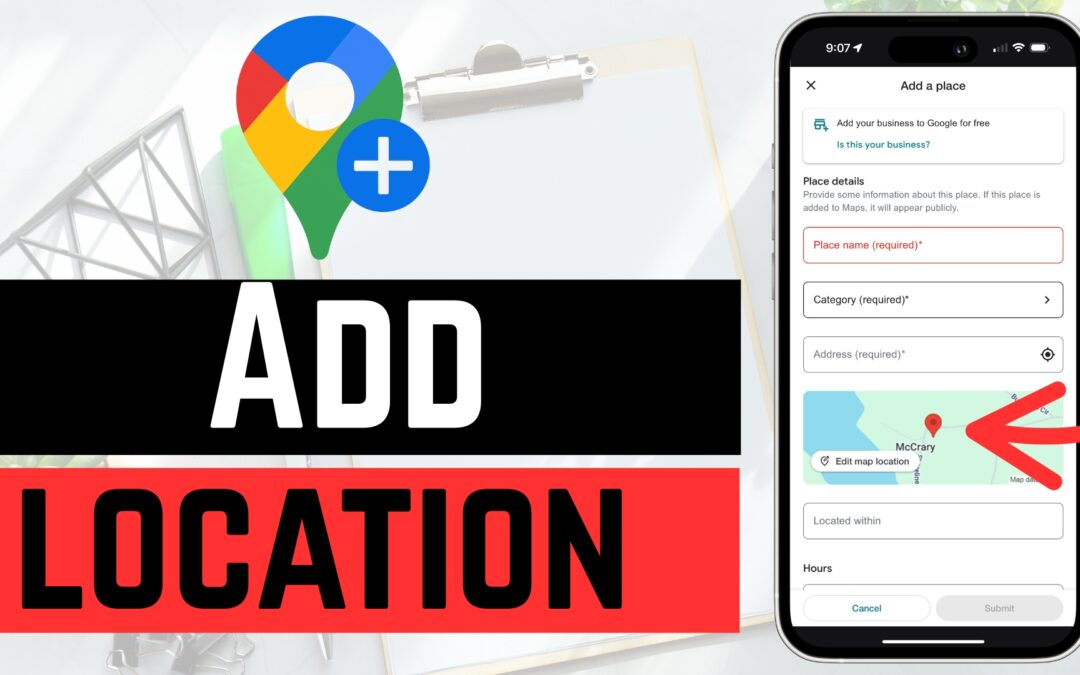
📍 Step 3: Add a Missing Place (Permanent Location)
To add a location that appears for everyone on Google Maps:
-
Tap your profile icon in the top-right corner of Google Maps.
-
Scroll down and tap “Add a missing place.”
-
Fill out the required information:
-
Name (e.g., “Dusty’s Donuts”)
-
Category (e.g., bakery, school, store, etc.)
-
Address (including suite number or building if applicable)
-
Make sure to:
-
Pinpoint the location accurately by adjusting the pin if necessary.
-
Add optional details like phone number, website, and business hours to help users find the place.
Once everything looks good, tap Submit — and your location will be sent to Google for review. It may take a few days to show up.
🧑💼 Bonus: Add Your Business to Google Maps
If you’re a business owner and want to appear officially on Google Maps and in Google Search:
-
While filling out the “Add a Missing Place” form, tap “Is this your business?”
-
Sign into your Google account.
-
Follow the steps to claim and verify your business through Google Business Profile.
-
Enter complete business information, like hours, website, photos, and services.
Once verified, your business will appear on Google Maps and gain all the benefits of Google Business.
💬 Final Thoughts
That’s how you can quickly and easily add a location to Google Maps — whether you’re trying to mark your go-to hiking trail or officially list your storefront.
If you found this guide helpful, be sure to check out the video tutorial on our YouTube channel and don’t forget to subscribe for more tech tips every week.

